
No more “It works on my machine”. In this blog, I will show you how I created and published a website on AWS EC2 with continuous deployment pipeline for free! Any change you make in source code will be automated compile, build and deploy within seconds once you push code into your github repository. My portfolio a.k.a this website is the result.
Technologies and the reason I choose them
- Docker - for containerization.
- Github Action - for CD pipeline.
- Hugo + Hugo-profile theme - for website builder.
- AWS EC2 - for website hosting (with docker installed).
Docker is the most popular tool for containerization that you should familiar with. Although I have more experience on Jenkins but setting it is quite complicated. So that, I decided to use Github Action which provide 2,000 minutes runtime per month (Too enough for my need). I chose Hugo to build my static website as it really easy to use and can build content from .md files. Hugo-extended includes a various themes to choose for non-web developer like me. There are so many ways to host a static website from Hugo framework for free. I chose EC2 mostly for learning purpose and because I have a plan to manually config my SSL certificate, reverse proxy, etc,… on those webservers (find it on my future blogs).
Build your website

Install Hugo
I will install Hugo on my devcontainer using prebuilt binary file. You can download it from hugo release page. Remember to download extended version so that you can use hugo themes. These command can be use for download and install Hugo framework in your environment.
mkdir ~/hugo-install
cd ~/hugo-install
wget https://github.com/gohugoio/hugo/releases/download/v0.133.1/hugo_extended_0.133.1_linux-amd64.tar.gz
tar -xzf hugo_extended_0.133.1_linux-amd64.tar.gz
chmod +x hugo
# Use root permission to copy hugo binary file to PATH folder.
sudo cp hugo /usr/local/bin/
Create hugo website and select theme
You can follow Hugo guide to learn how to build your website. My theme is hugo-profile if you interest.
If you are developing inside a container (like me), remember to re-bind the ip address to 0.0.0.0. So that, your hugo website can be accessed via host bind port:
hugo server --bind 0.0.0.0
Create docker image
 After finish your website, lets containerize it with docker. Because using hugo development webservice is not recommend in production, I will
 nginx. Remember to move your hugo-install folder into your workspace because we need to use hugo binary file. Don’t worry about image size since we can use docker multi-stage to copy only necesary files.
# Build stage.
FROM alpine:3.20.2 AS builder

# Install needed dependencies for hugo.
RUN apk update && \
    apk add --no-cache gcompat libstdc++

WORKDIR /app

# Copy source code to image (change ./devel to your folder).
COPY ./devel .

# Install hugo.
RUN cd hugo-install && \
    tar -xzf hugo_extended_0.133.0_linux-amd64.tar.gz && \
    chmod +x hugo && \
    mv hugo /bin/

# Clear old build. Then, rebuild website.
RUN rm -rf public && \
    hugo

# Production stage.
FROM nginx:1.27.1-alpine

# Copy necesary files from build stage
COPY --from=builder /app/public /usr/share/nginx/html

EXPOSE 80

CMD ["nginx", "-g", "daemon off;"]
Setting CD pipeline
 In order to use Github Action, you need to create
 .github/workflows folder in root project (same folder with .git). Then, create a .yml file in .github/workflows. Our pipline consist of 4 main steps:
- Download source code from repository.
- Build image from source.
- Push image into docker hub.
- SSH into server, pull image and run container.
This is my CD.yml contain pipeline of those steps:
name: Create and publish a Docker image
on:
  push:
    branches: ['main']
  workflow_dispatch:

env:
  REGISTRY: docker.io
  USER_NAME: duyaccel
  IMAGE_NAME: duyaccel/personal-web
  SSH_KEY: ${{ secrets.SSH_KEY }}
  SERVER: ${{ secrets.SERVER }}
  SV_USER: ${{ secrets.SV_USER }}


jobs:
  continuous_deployment:
    runs-on: ubuntu-latest
    permissions:
      contents: read
      packages: write
      attestations: write
      id-token: write
    steps:
      - name: Checkout repository
        uses: actions/checkout@v4
        with:
          submodules: 'true'

      - name: Log in to the Container registry
        uses: docker/login-action@65b78e6e13532edd9afa3aa52ac7964289d1a9c1
        with:
          registry: ${{ env.REGISTRY }}
          username: ${{ env.USER_NAME }}
          password: ${{ secrets.DOCKER_TOKEN }}

      - name: Extract metadata (tags, labels) for Docker
        id: meta
        uses: docker/metadata-action@9ec57ed1fcdbf14dcef7dfbe97b2010124a938b7
        with:
          images: ${{ env.REGISTRY }}/${{ env.IMAGE_NAME }}

      - name: Build and push Docker image
        id: push
        uses: docker/build-push-action@f2a1d5e99d037542a71f64918e516c093c6f3fc4
        with:
          context: .
          push: true
          tags: ${{ steps.meta.outputs.tags }}
          labels: ${{ steps.meta.outputs.labels }}

      - name: Deploy website
        run: |
          echo "$SSH_KEY" > private_key && chmod 600 private_key
          ssh -o StrictHostKeyChecking=no -i private_key ${SV_USER}@${SERVER} '
            docker rm -f portfolio || true
            docker image prune -af
            docker run -d --name portfolio -p 80:80 duyaccel/personal-web:main
           '
If you wonder what is:
  ${{ secrets.DOCKER_TOKEN }}
  SSH_KEY: ${{ secrets.SSH_KEY }}
  SERVER: ${{ secrets.SERVER }}
  SV_USER: ${{ secrets.SV_USER }}
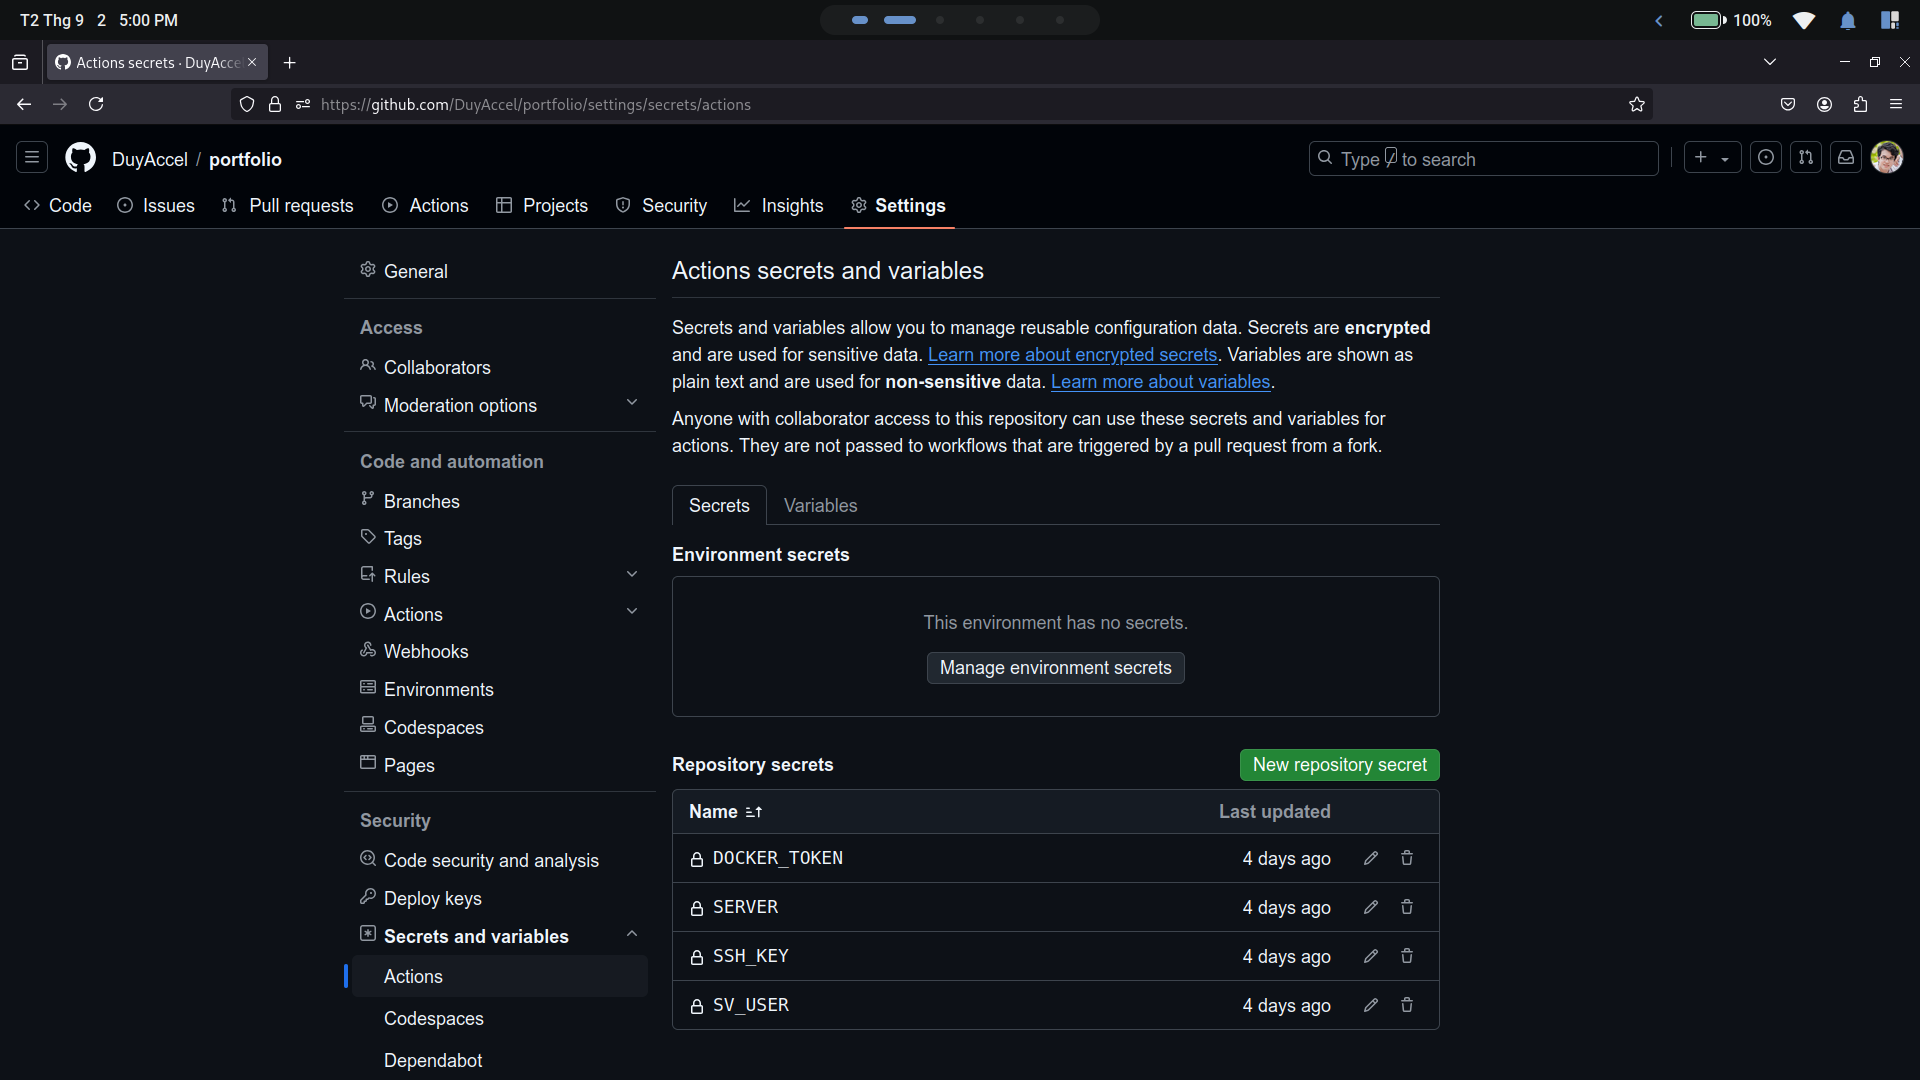 The answer is github secrets, we will need to add them to github repository before execute pipeline. Go to
 your repository -> Settings -> Security -> Secrets and variables -> Actions to add new secrets. What we need for this workflow are:
- DOCKER_TOKEN: token to sign in docker accout (create in your docker account setting).
- SSH_KEY: private key to SSH connect to your host.
- SERVER: host ip address.
- SV_USER: username of the host.
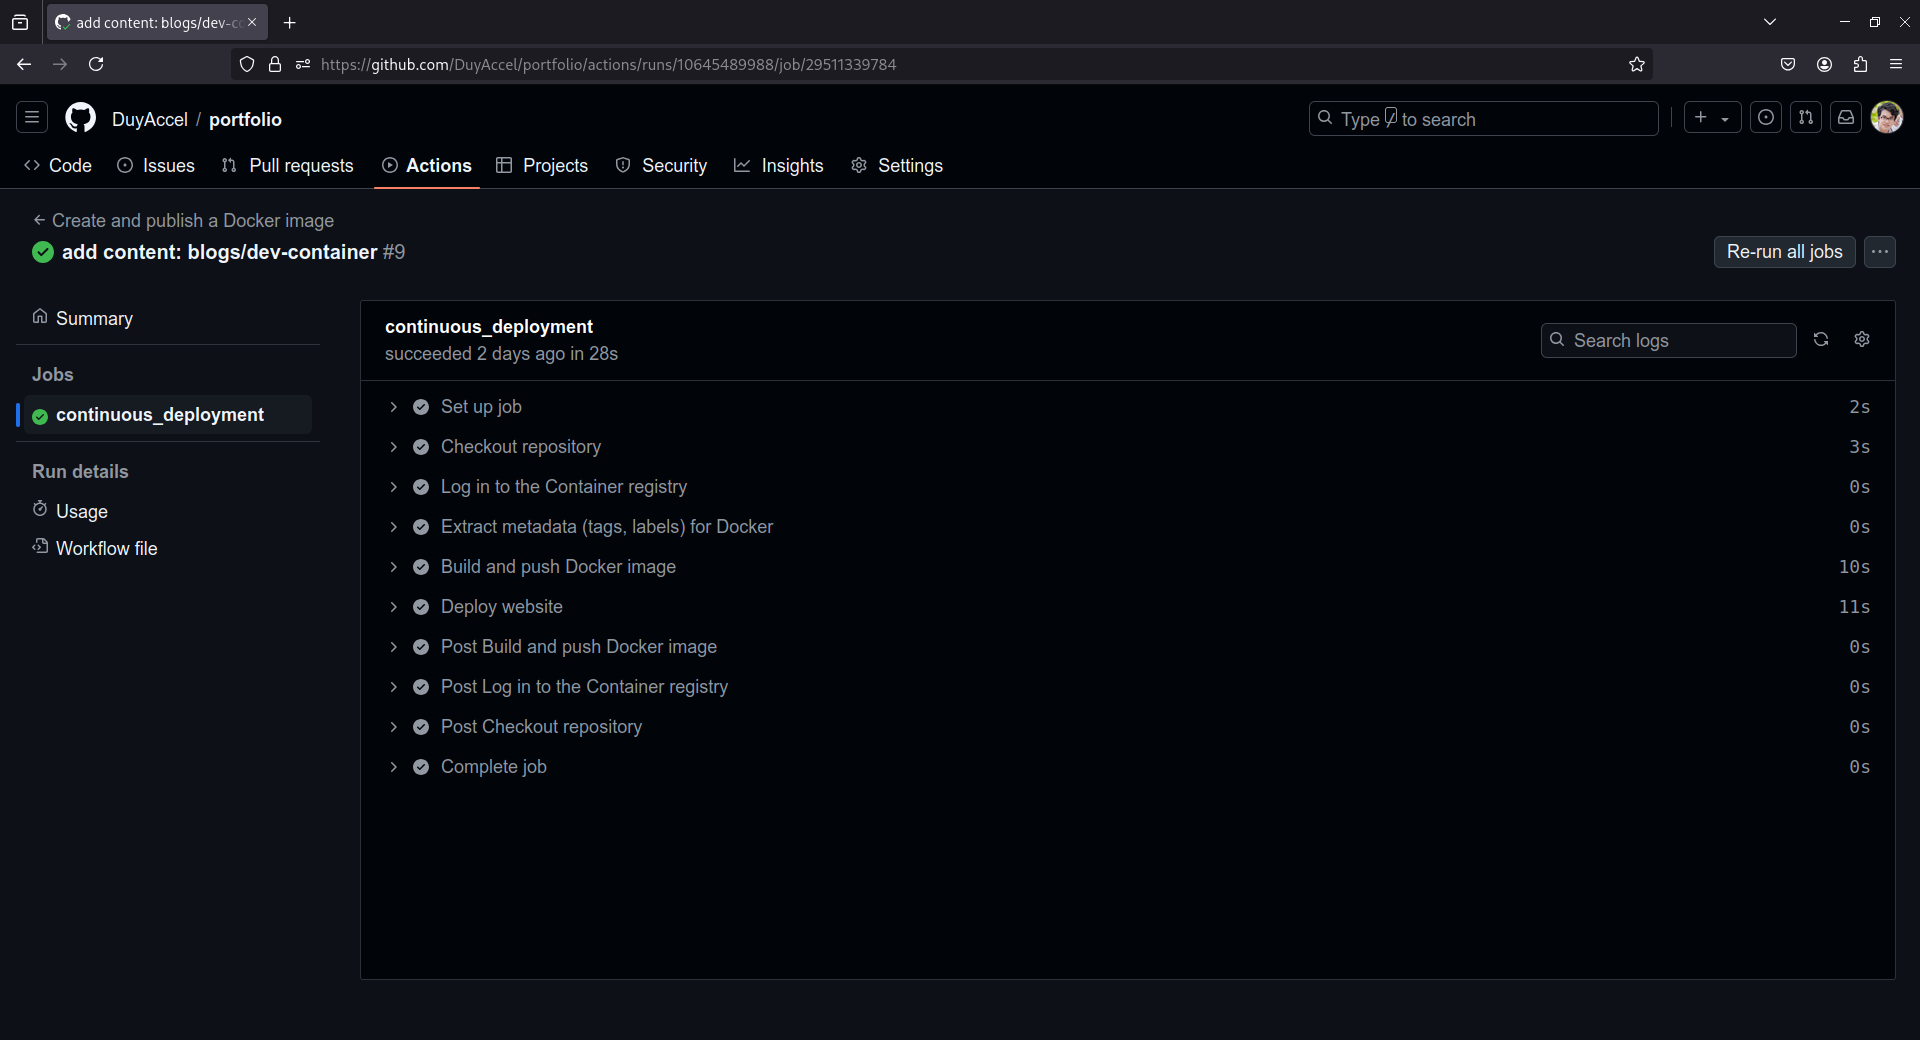
Execute pipeline
Having .github/workflows/CD.yml, you just need to push code to your repository and wait for it to be executed. We can view the progress in Actions tab of the repository.
 If nothing went wrong, you can find your website on your web browser by searching ip address/domain name. You can also ssh into host to check if your containers are working properly.
Conclusion
In this post, I introduced the way I create an continuos deployment pipeline for my portfolio website using Github Action. Though it is accessable from internet, the security warnings are really annoying. In the future, I will add SSL certificate for my website via something like reverse proxy to manage more webservices. Do you looking forward to it? By the way, thanks for reading, see you in next posts.
References: